GE Profile Wall Oven Manual: A Comprehensive Guide (Updated 03/23/2026)
This manual details the GE Profile Built-In Electric Double Convection Wall Oven, boasting advanced features like red LED indicators and smart functionality for optimal cooking.
GE Profile wall ovens represent a pinnacle of home cooking technology, designed to deliver exceptional performance and convenience. These ovens aren’t simply appliances; they are culinary centers built for the modern kitchen. Featuring innovative convection systems, like True European Convection, they ensure even baking and roasting results every time.
The Profile series distinguishes itself through a commitment to user-friendly design and smart integration. Models often include features like no-preheat functionality, saving valuable time, and compatibility with the SmartHQ platform for remote control and monitoring. With sleek aesthetics and robust build quality, a GE Profile wall oven elevates both the functionality and style of your kitchen.
Understanding Your Model Number
Your GE Profile wall oven’s model number is crucial for accessing specific information, parts, and support. Located on the oven frame (typically visible when the door is open), it’s a unique identifier for your exact appliance configuration. This alphanumeric code details features like size, color, and manufacturing date.
Decoding the model number allows you to find the correct replacement parts, download the most accurate manual, and receive tailored assistance from GE’s customer service. Keep this number readily available when contacting support or ordering components. It ensures you receive the right solutions for your specific GE Profile oven model.
Safety Precautions & Warnings
Prioritize safety when operating your GE Profile wall oven. Always supervise children near the appliance, as surfaces become extremely hot during and after use. Avoid touching heating elements or the interior while warm. Never use aerosol sprays near the oven, as they are flammable.
Exercise caution when opening the oven door, releasing steam or hot air. Ensure proper ventilation during self-cleaning cycles. Disconnect power before performing maintenance or repairs. Read all instructions thoroughly before first use and retain this manual for future reference to prevent potential hazards.
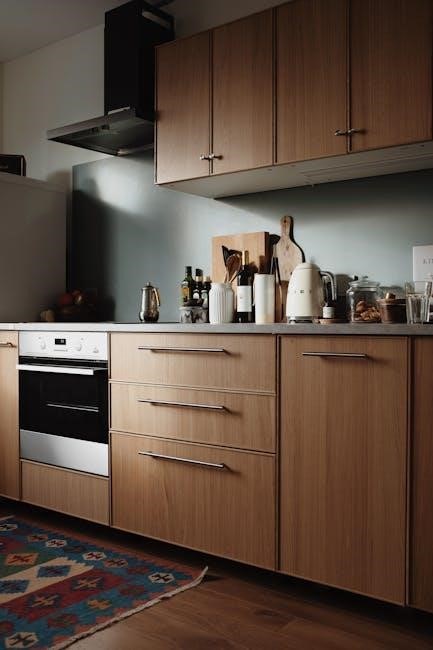
Control Panel Overview
The GE Profile wall oven’s control panel is designed for intuitive operation. It features a digital display showcasing temperature, cooking mode, and timer settings. Control knobs and buttons allow precise adjustments to oven functions. A strip of red LEDs, positioned above the upper oven, provides a visual cue for operation status.
Explore the panel’s various options, including baking, roasting, convection, and self-cleaning modes. Familiarize yourself with the display indicators for preheating, temperature, and cycle progress. Understanding these controls ensures efficient and accurate cooking experiences.
Display Features & Indicators
The GE Profile oven’s display provides crucial information during operation. It clearly shows the set temperature, remaining cook time, and selected cooking mode. Indicators illuminate to signal preheating progress, alerting you when the oven reaches the desired temperature. A timer display accurately tracks cooking duration, preventing over or undercooking.
Specific icons indicate active features like convection or self-clean. Error codes, if any, are also displayed here, assisting in troubleshooting. The bright, easy-to-read display ensures convenient monitoring of your culinary creations throughout the cooking process.
Control Knobs & Buttons – Functionality
The GE Profile oven utilizes intuitive control knobs and buttons for seamless operation. Knobs precisely adjust temperature and time settings, offering responsive control. Dedicated buttons activate specific cooking modes – bake, roast, convection, and broil – simplifying recipe execution. A ‘Start’ button initiates the cooking cycle, while ‘Cancel’ halts it immediately.
Additional buttons manage features like the timer, oven light, and self-clean cycle. The control panel’s layout is designed for ease of use, ensuring quick access to desired functions. These controls provide a user-friendly experience for both novice and experienced cooks.
Oven Operation Basics
Operating your GE Profile wall oven is straightforward. Begin by selecting your desired cooking mode using the control panel. Precise temperature control is achieved via the temperature knob, ensuring accurate cooking results. Utilize the timer function to set cooking durations, preventing overcooking.

Preheating is essential for consistent baking; allow the oven to reach the set temperature before placing food inside. Explore various baking and roasting modes for optimal results with different recipes. Familiarize yourself with convection settings for faster, more even cooking.
Preheating & Temperature Settings
Achieving accurate temperatures is crucial for successful baking. To preheat, select your desired mode and temperature using the control panel. The oven will automatically heat until the set temperature is reached, indicated by a signal. Temperature adjustments can be made during cooking, but allow time for stabilization.
GE Profile ovens offer precise temperature control, ensuring consistent results. Consider recipe recommendations for optimal temperatures. For convection baking, a slightly lower temperature may be required. Monitor the oven during preheating and cooking to maintain desired settings.
Baking & Roasting Modes Explained
GE Profile ovens provide versatile baking and roasting modes for diverse culinary needs. Bake mode is ideal for general baking tasks, utilizing heat from the bottom element. Roast mode employs heat from the top element, perfect for browning and searing. Convection modes circulate hot air for even cooking.
Explore specialized modes like broil for quick, high-heat cooking. Adjust settings based on your recipe and desired results. Experiment with different modes to discover optimal performance for various dishes. Proper mode selection ensures consistent and delicious outcomes.

Convection Baking – How it Works & Benefits
Convection baking utilizes a fan to circulate hot air throughout the oven cavity, resulting in faster and more even cooking. This eliminates hot spots, ensuring consistent results across all rack positions. Benefits include reduced cooking times, typically 25% faster than conventional baking, and enhanced browning and crisping.
GE Profile convection ovens often feature True European Convection, offering precise temperature control and optimal airflow. Ideal for baking multiple trays of cookies, roasting meats, and achieving perfectly golden-brown results. Embrace convection for superior baking performance!
Self-Cleaning Cycle
The Self-Clean cycle utilizes high temperatures to burn off food residue within the oven interior, eliminating the need for manual scrubbing. Before initiating, remove all racks, cookware, and any loose debris. Ensure proper ventilation, as the process can generate odors.
Cycle duration varies depending on the soil level, typically ranging from 2 to 4 hours. Monitor the cycle and avoid opening the oven door during operation. Post-clean, allow the oven to cool completely before wiping away any remaining ash residue.
Preparing for Self-Clean
Prior to initiating the Self-Clean cycle, meticulous preparation is crucial for optimal results and oven safety. Remove all oven racks, baking stones, thermometers, and any aluminum foil. Wipe up any large spills or excessive food debris from the oven floor, as these can create smoke during the high-heat process.
Ensure the oven door can fully close and latch securely. Check for any items lodged in the door crevices. Ventilate the kitchen by opening windows or using a range hood, as the cycle produces odors.
Self-Clean Cycle Duration & Monitoring
The Self-Clean cycle duration varies depending on the selected soil level – typically ranging from 2 to 4 hours. During operation, the oven door automatically locks for safety and remains locked until the cycle completes and the oven cools sufficiently. Avoid opening the door mid-cycle, as this disrupts the cleaning process and poses a burn risk;
Monitor the cycle’s progress via the control panel display, which indicates remaining time. A slight odor is normal; however, excessive smoke warrants immediate attention and ventilation. Do not leave the oven unattended during the self-clean process.
Post-Self-Clean Procedures
Once the Self-Clean cycle is complete, allow the oven to cool completely before unlocking the door. A small amount of ash residue may remain; this can be easily wiped away with a damp cloth. Ensure adequate ventilation during and after the cycle to dissipate any lingering odors.
Inspect the oven cavity for any remaining debris and remove it. Avoid using abrasive cleaners, as they can damage the oven’s interior. Reinstall any racks or accessories that were removed prior to cleaning. Your GE Profile oven is now ready for its next culinary adventure!
Troubleshooting Common Issues
Encountering problems with your GE Profile wall oven? This section addresses frequent concerns. If the oven isn’t heating, verify the power supply and check for tripped breakers. Error codes displayed on the control panel indicate specific issues; consult the full error code list for detailed explanations.

Control panel malfunctions, like unresponsive buttons, may require a power cycle – turn off the oven for several minutes, then restart. For persistent issues, contact GE Appliances support or a qualified technician for assistance. Always prioritize safety when troubleshooting.
Oven Not Heating
If your GE Profile oven fails to heat, begin with simple checks. Ensure the oven is properly connected to a functioning power outlet and that the circuit breaker hasn’t tripped. Verify the control panel is set to a baking or roasting mode, and the desired temperature is selected.

A faulty igniter (for gas models) or heating element (for electric models) could be the cause. If these components appear damaged, replacement is necessary. Contact a qualified technician for diagnosis and repair, prioritizing safety during any inspection.
Error Codes & Their Meanings
GE Profile wall ovens utilize error codes to diagnose issues. A common code, “F1” or “F1-E1”, often indicates a temperature sensor failure, requiring replacement by a qualified technician. “F2” suggests a relay issue, potentially impacting heating functionality. Other codes might relate to communication errors within the control board or problems with the convection fan.
Consult the complete error code list in the appendix of this manual or on the GE Appliances support website. Record the specific code displayed and have it ready when contacting customer service for efficient troubleshooting.
Control Panel Malfunctions
If the control panel becomes unresponsive, first attempt a power cycle: turn off the oven at the breaker for five minutes, then restore power. A frozen display may require the same reset procedure. If buttons fail to register presses, check for obstructions or debris. Persistent issues could indicate a faulty control board.
Avoid using abrasive cleaners on the control panel, as this can damage the surface and affect functionality. Contact GE Appliances support if the panel exhibits erratic behavior or displays incorrect information, providing the model number for assistance.

Care & Maintenance
Regular cleaning preserves your GE Profile oven’s performance and lifespan. For the interior, avoid harsh abrasives; a damp cloth with mild detergent is usually sufficient. The exterior and control panel benefit from gentle wiping with a soft cloth and stainless steel cleaner (if applicable).
Always disconnect power before any maintenance. To replace the oven light, consult the manual for specific bulb type and access instructions. Preventative care, like promptly addressing spills, minimizes buildup and ensures optimal cooking results. Routine checks maintain efficiency.
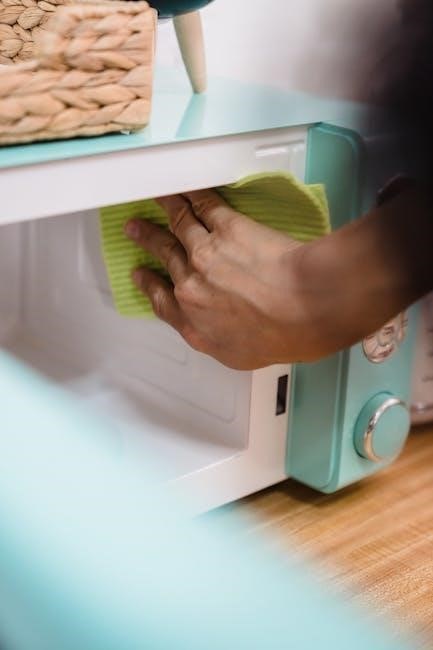
Cleaning the Oven Interior
Maintaining a clean oven interior is crucial for efficient cooking and preventing unwanted odors. For light cleaning, a damp cloth with mild dish soap effectively removes spills and splatters. Avoid abrasive cleaners or scouring pads, as they can damage the enamel surface.
For baked-on residue, a paste of baking soda and water can be applied, left for a period, then wiped clean. Always ensure the oven is cool before cleaning. Regular interior wipes prevent buildup, reducing the need for intensive cleaning sessions.
Cleaning the Exterior & Control Panel
To preserve the appearance of your GE Profile wall oven, regular exterior cleaning is recommended. Use a soft, damp cloth with mild soap and water to wipe down the stainless steel surfaces. Avoid harsh chemicals or abrasive cleaners, which can cause discoloration or scratching.
For the control panel, a slightly dampened cloth is ideal. Ensure no liquid enters the control panel openings. Stubborn fingerprints can be removed with a stainless steel cleaner specifically designed for appliances. Regular wiping prevents buildup and maintains a sleek, modern look.
Replacing Oven Light Bulbs
Before replacing the bulb, always disconnect the oven’s power supply at the circuit breaker to prevent electrical shock. Locate the oven light, typically found at the back of the oven cavity, often behind a protective cover. Remove the cover carefully, usually by unscrewing or unclipping it.
Gently unscrew the old bulb and replace it with a new bulb of the correct wattage, as specified in the oven’s specifications. Avoid touching the new bulb with bare hands; use a cloth or gloves. Reattach the cover and restore power to test the new bulb.
Advanced Features (Specific to Profile Models)
GE Profile wall ovens distinguish themselves with innovative technologies. True European Convection utilizes a rear fan for consistent, even baking results, eliminating hot and cold spots. The No-Preheat function allows immediate baking, saving valuable time without compromising quality.
SmartHQ integration offers remote control and monitoring via a smartphone app, providing convenience and flexibility. LED lighting enhances visibility inside the oven. These features combine to deliver a superior cooking experience, making the GE Profile a standout choice.
True European Convection
True European Convection represents a significant advancement in oven technology, setting GE Profile models apart. Unlike standard convection, this system employs a rear fan to circulate hot air in a horizontal pattern. This ensures remarkably uniform temperatures throughout the oven cavity, effectively eliminating hot and cold spots that can lead to unevenly baked goods.
The result is consistently golden-brown cookies, perfectly roasted meats, and evenly browned casseroles. This technology delivers professional-quality results at home, simplifying complex recipes and enhancing overall cooking performance.
No-Preheat Functionality
GE Profile ovens with No-Preheat functionality dramatically reduce cooking time and enhance convenience. This innovative feature intelligently adjusts cooking parameters, allowing you to begin baking immediately without waiting for the oven to reach a specific temperature. It’s ideal for busy weeknights or when you’re short on time.
The oven rapidly reaches the desired temperature while cooking, ensuring consistent and delicious results. This technology works particularly well with frequently used recipes, streamlining the cooking process and saving valuable energy.
SmartHQ Integration & Remote Control
GE Profile ovens seamlessly integrate with the SmartHQ app, offering unparalleled control and convenience. Through the app, you can remotely monitor and adjust oven settings, preheat the oven from anywhere, and receive notifications when your cooking is complete.
Voice control compatibility with Google Assistant and Amazon Alexa further enhances usability. You can start, stop, or check the oven’s status using simple voice commands. SmartHQ also provides access to guided cooking programs and recipe recommendations, elevating your culinary experience.