Printing PDF sewing patterns is a popular method for creating custom garments. It allows sewists to download and print patterns at home or via copy shops. This cost-effective and flexible approach ensures accurate sizing and design. By following proper printer settings and assembly techniques, sewists can achieve professional results. PDF patterns offer convenience, scalability, and accessibility for crafters of all skill levels.
What Are PDF Sewing Patterns?
PDF sewing patterns are digital templates in Portable Document Format (PDF) that guide the creation of garments, accessories, or home decor. They are downloaded and printed at home or via copy shops. These patterns include markings, instructions, and sizing options, often in multiple sizes for flexibility. Unlike physical patterns, PDFs are scalable and easily shared. They are cost-effective and convenient, offering instant access to designs. Many patterns are tiled for home printing on standard paper sizes (A4, US Letter) or available in large-format A0 for copy shops. This digital format has revolutionized sewing, making patterns accessible worldwide.
Why Use PDF Sewing Patterns?
PDF sewing patterns are a cost-effective and convenient alternative to traditional paper patterns. They offer flexibility, allowing users to print only the sizes and pieces needed, reducing waste. PDFs are instantly downloadable, eliminating shipping costs and wait times. They often include multiple sizes, making them versatile for various body types. Many designers provide free or low-cost patterns, making sewing accessible to all skill levels. Additionally, PDFs are eco-friendly and space-saving, as they can be stored digitally. This format has become popular among sewists due to its ease of use, scalability, and the wide range of designs available online.
Essential Tools and Materials Needed
To successfully print and assemble PDF sewing patterns, you’ll need a few basic tools. A reliable printer, preferably with A4 or US Letter size capability, is essential. Adobe Acrobat Reader is required to open and print the PDF files accurately. For assembling, you’ll need a sharp utility knife or scissors, a large, flat surface, and clear tape to secure the pages together. A ruler or measuring tape can help ensure alignment accuracy; High-quality paper, such as cardstock or bright white printer paper, is recommended for durability. Optional tools include a cutting mat and a bone folder for precise folding and taping.
Preparing Your PDF Sewing Pattern for Printing
Download and save the PDF file, ensuring it’s opened in Adobe Acrobat Reader for accuracy. Review the pattern format and check test squares for proper scaling before printing.
Downloading and Saving the PDF File
Start by downloading the PDF sewing pattern from the provider’s website. Ensure the file is saved in a dedicated folder on your device for easy access. Most patterns are accessible under a Digital Patterns tab in your account. Once downloaded, open the file in Adobe Acrobat Reader to ensure proper viewing and printing. Avoid using web browsers to open PDFs, as this may cause scaling issues. Check the file for test squares or guides, which help verify accuracy during printing. Organize your saved patterns to streamline the process and prevent loss of files.
Opening the PDF in Adobe Acrobat Reader
Open the downloaded PDF sewing pattern in Adobe Acrobat Reader for reliable viewing and printing. This software ensures proper rendering of the pattern’s layout and scaling. Upon opening, verify the presence of test squares or guides, which confirm the pattern’s accuracy. Use the Snapshot Tool to measure these squares and ensure they match the specified size. Review the pattern’s instructions and layout within Acrobat to understand how pages are arranged. Check the Print Preview option to see how the pattern will appear on paper. This step ensures all elements are visible and correctly formatted before printing begins.
Understanding the Pattern File Format
PDF sewing patterns are typically multi-page files containing grids, lines, and markers to guide cutting and sewing. Each page includes a test square to ensure correct scaling. Patterns may be formatted for A0, A4, or US Letter sizes, depending on the designer. Some files are tiled, meaning they are split into smaller pages for home printing, while others are designed for large-format printing. Look for page numbers, alignment markers, and instructions within the PDF. Understanding the layout and components ensures accurate assembly and use of the pattern. Always check the first page for specific instructions or guides provided by the pattern creator.
Printer Settings for PDF Sewing Patterns
Ensure Adobe Acrobat Reader is set to print at 100% scale with actual size selected. Choose landscape or portrait orientation as instructed. Adjust margins to none for full-page printing.
Checking Print Scaling and Size
Ensure your PDF sewing pattern prints at the correct scale by selecting the “Actual Size” or “100% Scale” option in your printer settings. This prevents resizing or distortion of the pattern. Always print a test page first, which often includes a 1-inch scale or test square, to verify accuracy. Measure the test square with a ruler to confirm the printout matches the expected size. Proper scaling is crucial for ensuring that your sewing pattern pieces fit together correctly and your final garment is the right size. Adjust settings if necessary before printing the full pattern.
Setting the Correct Paper Orientation
Setting the correct paper orientation is crucial for printing PDF sewing patterns. Choose between portrait or landscape based on the pattern’s layout to ensure proper fit on the page. Ensure your printer is set to match the pattern’s requirements, as incorrect orientation may cause pieces to be split or misaligned. Most PDF patterns are designed to print automatically in the correct orientation, but double-check the settings to avoid errors. For large patterns, landscape mode is often preferred to accommodate longer design elements. Always preview the print layout to confirm orientation before printing to save paper and time. Proper orientation ensures seamless assembly and accurate results.
Adjusting Margins and Layout

Adjusting margins and layout ensures PDF sewing patterns print correctly without cropping or misalignment. Use your printer’s settings to set margins to zero or the smallest possible value to maximize the printable area. Some PDFs include a borderless option for edge-to-edge printing. Check the pattern’s layout in the print preview to verify that all elements fit within the page. If necessary, adjust the layout by selecting fit to page or custom scale options. Proper margin and layout settings prevent pattern pieces from being cut off, ensuring accuracy and ease of assembly. This step is essential for achieving professional results in your sewing projects.
Printing Methods for Sewing Patterns
Printing sewing patterns can be done at home or via a copy shop. Home printing offers convenience, while copy shops handle large-format patterns efficiently. Both methods ensure accuracy and ease of use.
Printing at Home: A Step-by-Step Guide
Printing sewing patterns at home is straightforward with the right tools. First, download and save the PDF file to your device. Open it in Adobe Acrobat Reader, ensuring the latest version is installed for compatibility. Before printing, check that the printer settings are correct, selecting “Actual Size” and “Portrait” orientation; Print a test page to verify scaling accuracy. Once confirmed, print all pages and organize them for assembly. For large patterns, use a copy shop to avoid taping multiple sheets. Print on high-quality paper for durability, ensuring your pattern remains intact for future use.
Using a Copy Shop for Large-Format Printing
Using a copy shop for large-format printing is ideal for sewing patterns that exceed standard paper sizes. Simply upload the PDF file to the shop’s platform or take it in person. Choose the A0 or large-format option to print the pattern without taping multiple pages. Many copy shops offer high-quality paper and precise scaling. Some services even provide test squares to ensure accuracy; This method saves time and effort, especially for complex patterns. Once printed, pick up your pattern and assemble it at home. Copy shops are cost-effective and convenient, ensuring professional results for large or intricate designs.
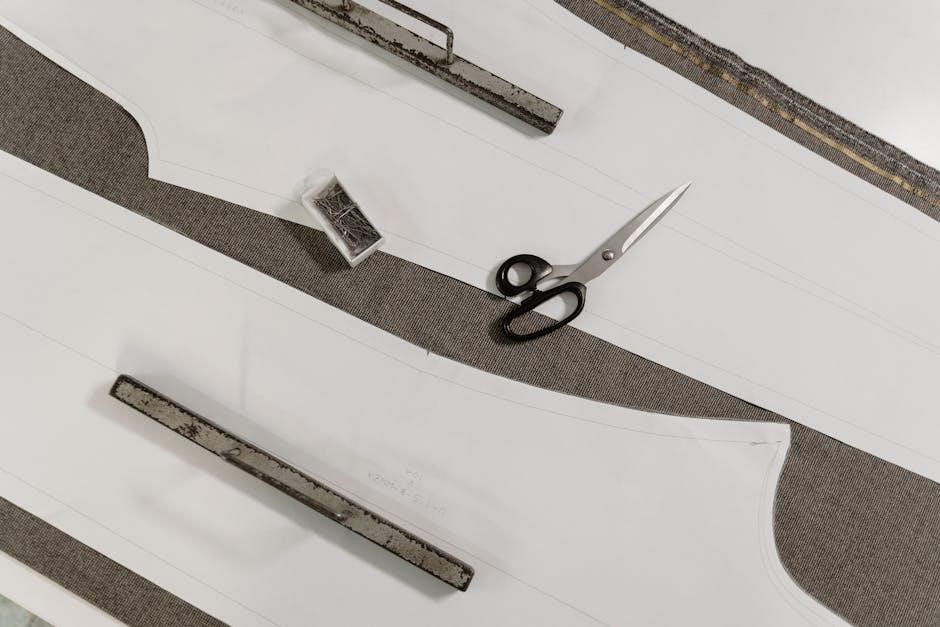
Assembling Your Printed Sewing Pattern
Assembling involves matching markers and guides to align pages accurately. Tape pages together at edges, ensuring lines and symbols connect seamlessly for a perfect fit and precise cutting.
Matching Pattern Markers and Guides
Matching pattern markers and guides ensures accuracy when assembling printed PDF sewing patterns. Look for symbols like circles, diamonds, or lines at the edges of pages. These markers align with corresponding symbols on adjacent pages, helping you connect the pattern pieces correctly. Page numbers and arrows also guide proper alignment. To match accurately, place pages on a flat surface and align the markers visually or with a ruler. Ensure the pattern lines and symbols meet seamlessly to maintain the integrity of the design. This step is crucial for achieving the correct shape and fit of your finished garment. Precision is key to avoid errors.
Taping Pages Together Accurately
Taping pages together accurately ensures your PDF sewing pattern assembles seamlessly. Start by aligning the edges of the printed pages using the markers or guides provided. Use a ruler or alignment tool for precision. Apply clear Scotch tape along the edges where the pages meet, ensuring the tape is smooth and free of wrinkles. Work in small sections to maintain accuracy, and press firmly to secure the bond. Double-check that the seams and markers align perfectly before taping. Once taped, allow the pattern to lie flat for a few minutes to set the adhesive. This step ensures the pattern remains stable for cutting fabric accurately.
Aligning Pages for Perfect Fit
Aligning pages accurately is crucial for achieving a perfect fit in your sewing project. Start by ensuring each page is printed to scale, using the test squares provided in the pattern. Match the alignment markers or guides located on the edges of the pages to ensure proper positioning. Once aligned, secure the pages temporarily with clips or weights before taping. Check the overall layout on a flat surface to confirm that all seams and pattern lines connect smoothly. Make any necessary adjustments before finalizing the assembly. Proper alignment guarantees that your pattern pieces fit together seamlessly, ensuring a professional finish.

Using Test Squares for Accuracy
Test squares ensure your PDF pattern prints at the correct scale. Always measure the test square to confirm accuracy before cutting fabric. Inaccurate scaling can lead to ill-fitting garments, so it’s crucial to verify the size before proceeding.
What Are Test Squares?
Test squares are reference tools within PDF sewing patterns to ensure accurate printing; They are typically 1-inch or 2-inch squares located on the first page of the pattern. By measuring these squares after printing, sewists can confirm that their printer is scaling the pattern correctly. Proper scaling is essential for maintaining the intended proportions of the design. Many patterns include multiple test squares for added reliability. If the test square does not match the specified size, adjustments to printer settings may be necessary to ensure the entire pattern prints accurately.
How to Use Test Squares for Scaling
To ensure accuracy, print the test square page first. Measure the square with a ruler to confirm it matches the specified size (e.g., 1 inch or 2 inches). If the square is too small or large, adjust your printer settings and reprint. Proper scaling ensures the pattern fits correctly. Always verify scaling before printing the entire pattern to avoid resizing issues. This step is crucial for maintaining the intended proportions of the design. By using test squares, you can confidently achieve precise results for your sewing projects. Incorrect scaling can lead to ill-fitting garments, making this step essential for success.
Alternative Printing Options
Explore options like printing on A0, A4, or US Letter sizes for flexibility. Consider black and white printing to save costs without sacrificing pattern clarity. Use copy shops for large-format prints to avoid taping pages, ensuring precise scaling and convenience for complex designs.
Printing on A0, A4, or US Letter Sizes
Printing PDF sewing patterns on A0, A4, or US Letter sizes offers flexibility for various projects. A0 is ideal for large-format printing, eliminating the need to tape multiple pages. A4 and US Letter are standard for home printers, suitable for most sewing projects. Ensure the pattern file is formatted correctly for your chosen size. Many PDF patterns include multiple page formats, allowing you to select the one that matches your printer capabilities. Use test squares to verify scaling accuracy. Choose the size that best fits your project needs and printing resources. This ensures a seamless sewing experience with professional results every time.
Printing in Black and White for Cost Efficiency
Printing PDF sewing patterns in black and white is a cost-effective option that maintains clarity while reducing ink usage. Most patterns are designed to be printed in monochrome, as color is unnecessary for sewing instructions. This method saves printer ink and associated costs. Ensure your printer settings are set to black and white or grayscale to avoid unnecessary color printing. Many patterns also include a “draft” mode for even faster, ink-saving printing. This approach is ideal for home printers, as it enhances affordability without compromising the pattern’s readability or accuracy. It’s a practical choice for sewists aiming to minimize expenses while achieving professional results.
Tips for Working with PDF Sewing Patterns
Use high-quality paper for durability and clear printing. Always check test squares for accuracy. Ensure printer settings match the pattern’s requirements for precise scaling and alignment.
Ensuring the Right Printer Settings
Correct printer settings are crucial for accurate PDF sewing pattern printing. Open the PDF in Adobe Acrobat Reader and ensure “Actual Size” is selected. Choose the correct paper size and orientation. Disable “Fit to Page” to maintain scale. Adjust margins to zero or minimal to prevent cropping. Use “Print as Image” option for clarity. Select high-quality print settings and check the “Test Square” on the first page to verify scaling accuracy. Proper settings ensure patterns print correctly, saving time and fabric. Always preview before printing to confirm layout and size.
Using High-Quality Paper for Durability
Using high-quality paper ensures your printed sewing patterns are durable and long-lasting. Opt for bright white, 80-100 gsm paper for clear, sharp lines and markers. Avoid thin or flimsy paper, as it may tear easily during use. High-quality paper reduces the risk of fading or smudging, ensuring patterns remain legible over time. This is especially important for complex designs or frequently used patterns. Investing in durable paper enhances your sewing experience, providing a professional finish and making tracing and cutting easier. Always choose paper that aligns with your printer’s recommendations for optimal results and pattern longevity.

Troubleshooting Common Issues
Common issues when printing PDF sewing patterns include scaling errors, misaligned pages, and paper mismatch. Use test squares to verify accuracy and adjust printer settings as needed.
Fixing Scaling Errors in Printed Patterns
Scaling errors are common when printing PDF sewing patterns. To fix this, ensure the printer settings are set to “Actual Size” or “100%” scaling. Print a test page containing a test square, usually 1×1 inch or 2×2 cm, and measure it with a ruler. If the test square is not accurate, adjust the printer settings or use the “Print as Image” option in Adobe Acrobat Reader. This ensures the pattern prints correctly without enlargement or reduction, maintaining the intended measurements for precise sewing outcomes; Always verify scaling before printing the entire pattern to avoid wasting materials and time.
Dealing with Misaligned or Cropped Pages
Misaligned or cropped pages can disrupt the accuracy of your sewing pattern. To resolve this, ensure the printer settings are set to “Actual Size” and disable any auto-scaling features. Print a test page to check alignment and page boundaries. If pages are cropped, adjust the margins in your printer settings or use the “Fit to Printable Area” option carefully. For misalignment, use grid lines or markers on the pattern to guide page assembly. Taping pages together accurately ensures proper alignment. If issues persist, consider reprinting specific pages or using a copy shop for precise large-format printing. This ensures seamless pattern assembly.

Finishing Touches
Ensure your printed patterns are neatly stored in labeled folders or envelopes. Organize digital files securely for future use. Keep everything tidy for easy access and reuse.
How to Store Your Printed Patterns
Store your printed patterns in labeled folders or protective sleeves to prevent damage. Use sturdy envelopes or clear plastic bins for easy visibility. Organize patterns by type, size, or project for quick access. Keep them flat in a dry, cool place to maintain their shape and quality. Consider using a binder with page protectors for smaller patterns. Label each folder or bin clearly for easy identification. For long-term storage, digitize your patterns by scanning and saving them to a secure cloud or external drive. This ensures your collection remains safe and accessible for future projects.
Organizing Digital and Physical Files
To maintain efficiency, organize your digital files by creating folders based on categories like garment type, size, or designer. Use clear filenames and consider backing up your files to an external drive or cloud storage. For physical patterns, store them in labeled binders or protective sleeves to prevent damage. Cross-reference your digital and physical files for easy access. Keep a master list or spreadsheet to track all patterns, including details like fabric requirements. This system ensures you can quickly locate the pattern you need, saving time and reducing clutter. A well-organized system enhances your sewing experience.
Additional Resources and Tutorials
Explore recommended tutorials for mastering PDF sewing patterns, including guides on printing, assembling, and scaling. Discover free resources and tools to enhance your sewing journey.
Recommended Tutorials for Beginners
Start with step-by-step guides to download, print, and assemble PDF patterns. Learn how to check scaling, adjust printer settings, and use test squares for accuracy. Discover tutorials that cover essential skills like taping pages and aligning patterns. These resources are perfect for mastering the basics of digital sewing patterns. Many tutorials also include tips for organizing files and troubleshooting common issues. Whether you’re printing at home or using a copy shop, these guides will help you feel confident in working with PDF sewing patterns. They often include visual aids and detailed instructions to ensure a smooth learning process for beginners.
Where to Find Free PDF Sewing Patterns
Discover a wide range of free PDF sewing patterns online. Websites like Craftsy, Pinterest, and Simplicity offer free patterns for clothing, accessories, and home decor. Many sewing blogs and independent designers also provide complimentary patterns for beginners. Search for terms like “free printable sewing patterns” or “PDF sewing patterns for beginners.” Platforms like Brother Sewing and Sew Over It frequently share free patterns. These resources are perfect for learning and experimenting without cost. Always ensure the patterns are in formats like A4 or US Letter for easy printing. Explore these options to find the perfect design for your next sewing project.